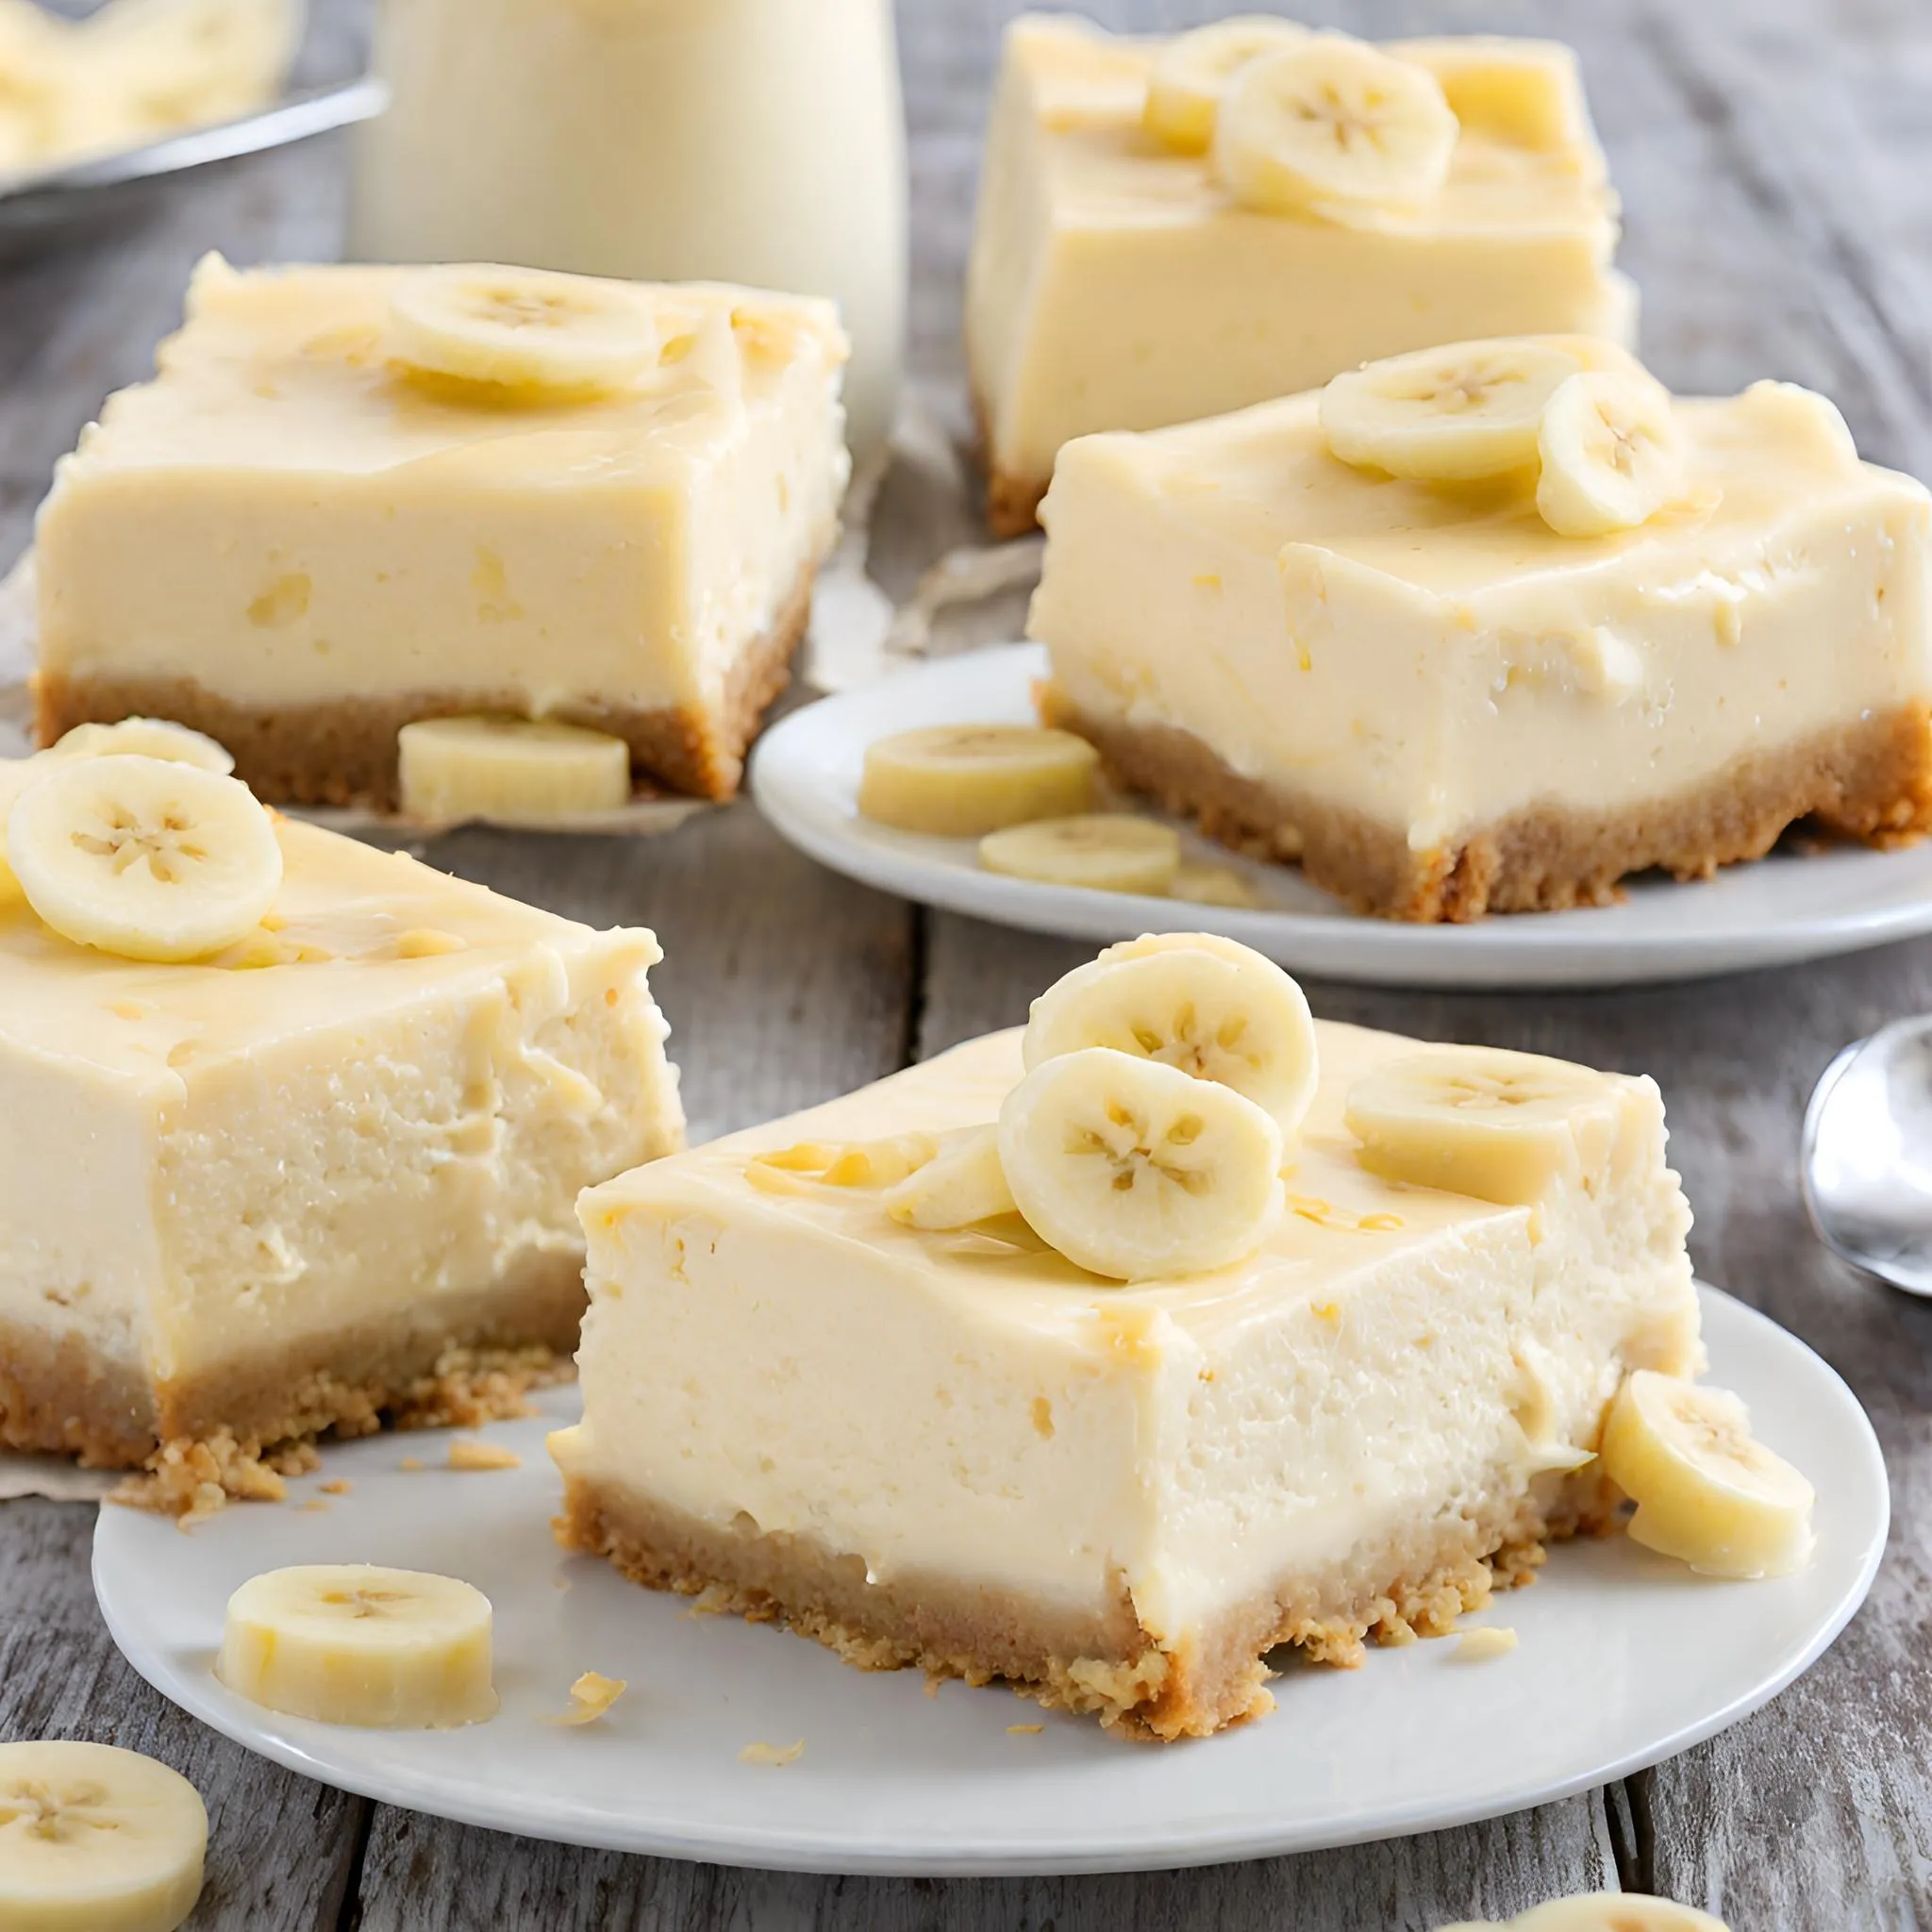
Are you craving something sweet, creamy, and absolutely indulgent? Look no further! These Banana Cream Cheese Cheesecake Bars are a game-changer in the world of desserts. Combining the comforting flavors of banana cream with the richness of cheesecake, this recipe is sure to become a fast favorite for any occasion.
Key Ingredients: A Perfect Blend of Flavor and Texture
Nilla Wafer Cookie Crumbs: The foundation of our cheesecake bars is made from Nilla Wafer cookie crumbs, offering a sweet and slightly crunchy base.
Butter: Melted butter binds the cookie crumbs, ensuring a firm and delicious crust.
Heavy Whipping Cream & Sugar: Whipped to stiff peaks, these ingredients add a light and airy texture to the cheesecake.
Cream Cheese: The star of the show, cream cheese, delivers the unmistakable cheesecake richness.
Instant Banana Cream Pudding Mix: This ingredient infuses our cheesecake with a delightful banana cream flavor that’s both subtle and satisfying.
Optional Garnish: A dollop of whipped topping and a few banana slices make for a beautiful and tasty garnish.
Simple Steps to Cheesecake Perfection
Crust Preparation: Start by combining Nilla Wafer crumbs and melted butter. Press this mixture into a parchment-lined 8×8-inch baking pan and chill.
Whipped Cream Mixture: Whip the heavy whipping cream and sugar to stiff peaks and set aside.
Cream Cheese Mixture: Beat the cream cheese smoothly, then gradually add the banana cream pudding mix.
Combining Mixtures: Gently fold the whipped cream into the cream cheese mixture until smooth.
Assembling: Spread the filling over the chilled crust and refrigerate for at least 8 hours.
Serving: Cut into squares, garnish with whipped topping and banana slices, and enjoy!
Related Recipes:
Nutritional Info and Serving Size
Calories: Approximately 400-500 kcal per serving.
Servings: This recipe yields 9 delightful servings.
Why This Recipe is a Must-Try
Versatile: Perfect for any occasion, be it a family gathering, a potluck, or just a treat for yourself.
Easy to Make: With straightforward steps, this recipe is accessible to bakers of all skill levels.
Deliciously Unique: The combination of banana cream and cheesecake offers a unique twist on traditional cheesecake bars.
Serving and Storage Tips
These Banana Cream Cheese Cheesecake Bars not only taste amazing but also come with the added benefit of being relatively easy to serve and store. Follow these tips to ensure your cheesecake bars remain as delicious as the moment they were made:
Serving Tips:
- Chill Before Serving: For the best texture and flavor, ensure the cheesecake bars are thoroughly chilled (at least 8 hours, preferably overnight) before serving. This chilling time helps the bars to set properly.
- Clean Cuts: For neat, clean cuts, use a sharp, thin-bladed knife. Dip the knife in hot water and wipe it dry between each cut. This prevents the creamy filling from sticking to the knife and ensures beautifully presented slices.
- Garnishing: Add the garnishes right before serving. A dollop of whipped cream and a few fresh banana slices on each bar make them visually appealing and enhance the flavor. Remember, banana slices may brown if left out for too long, so it’s best to add them just before serving.
- Room Temperature: Allow the bars to sit at room temperature for about 10-15 minutes before serving. This slight softening brings out the richness of the flavors more effectively.
Storage Tips:
- Refrigeration: Store any leftover cheesecake bars in the refrigerator, covered with plastic wrap or in an airtight container. This keeps them fresh and prevents them from absorbing odors from other foods in the fridge.
- Duration of Storage: These cheesecake bars can be stored in the refrigerator for up to 5 days. The freshness of the ingredients will start to decline after that, especially the banana garnish.
- Freezing Option: For longer storage, you can freeze the cheesecake bars. Wrap them individually in plastic wrap and then place them in a ziplock freezer bag. They can be frozen for up to a month. To defrost, place them in the refrigerator overnight or at room temperature for a few hours.
- Avoid Sogginess: If you’re freezing the bars, consider adding the banana garnish only when serving, as bananas don’t freeze well and can turn soggy upon thawing.
By following these serving and storage tips, you can enjoy your Banana Cream Cheese Cheesecake Bars at their best, whether served immediately or enjoyed as a delightful treat days later. Remember, the key to the perfect cheesecake experience lies in how well you serve and store these delicious bars!
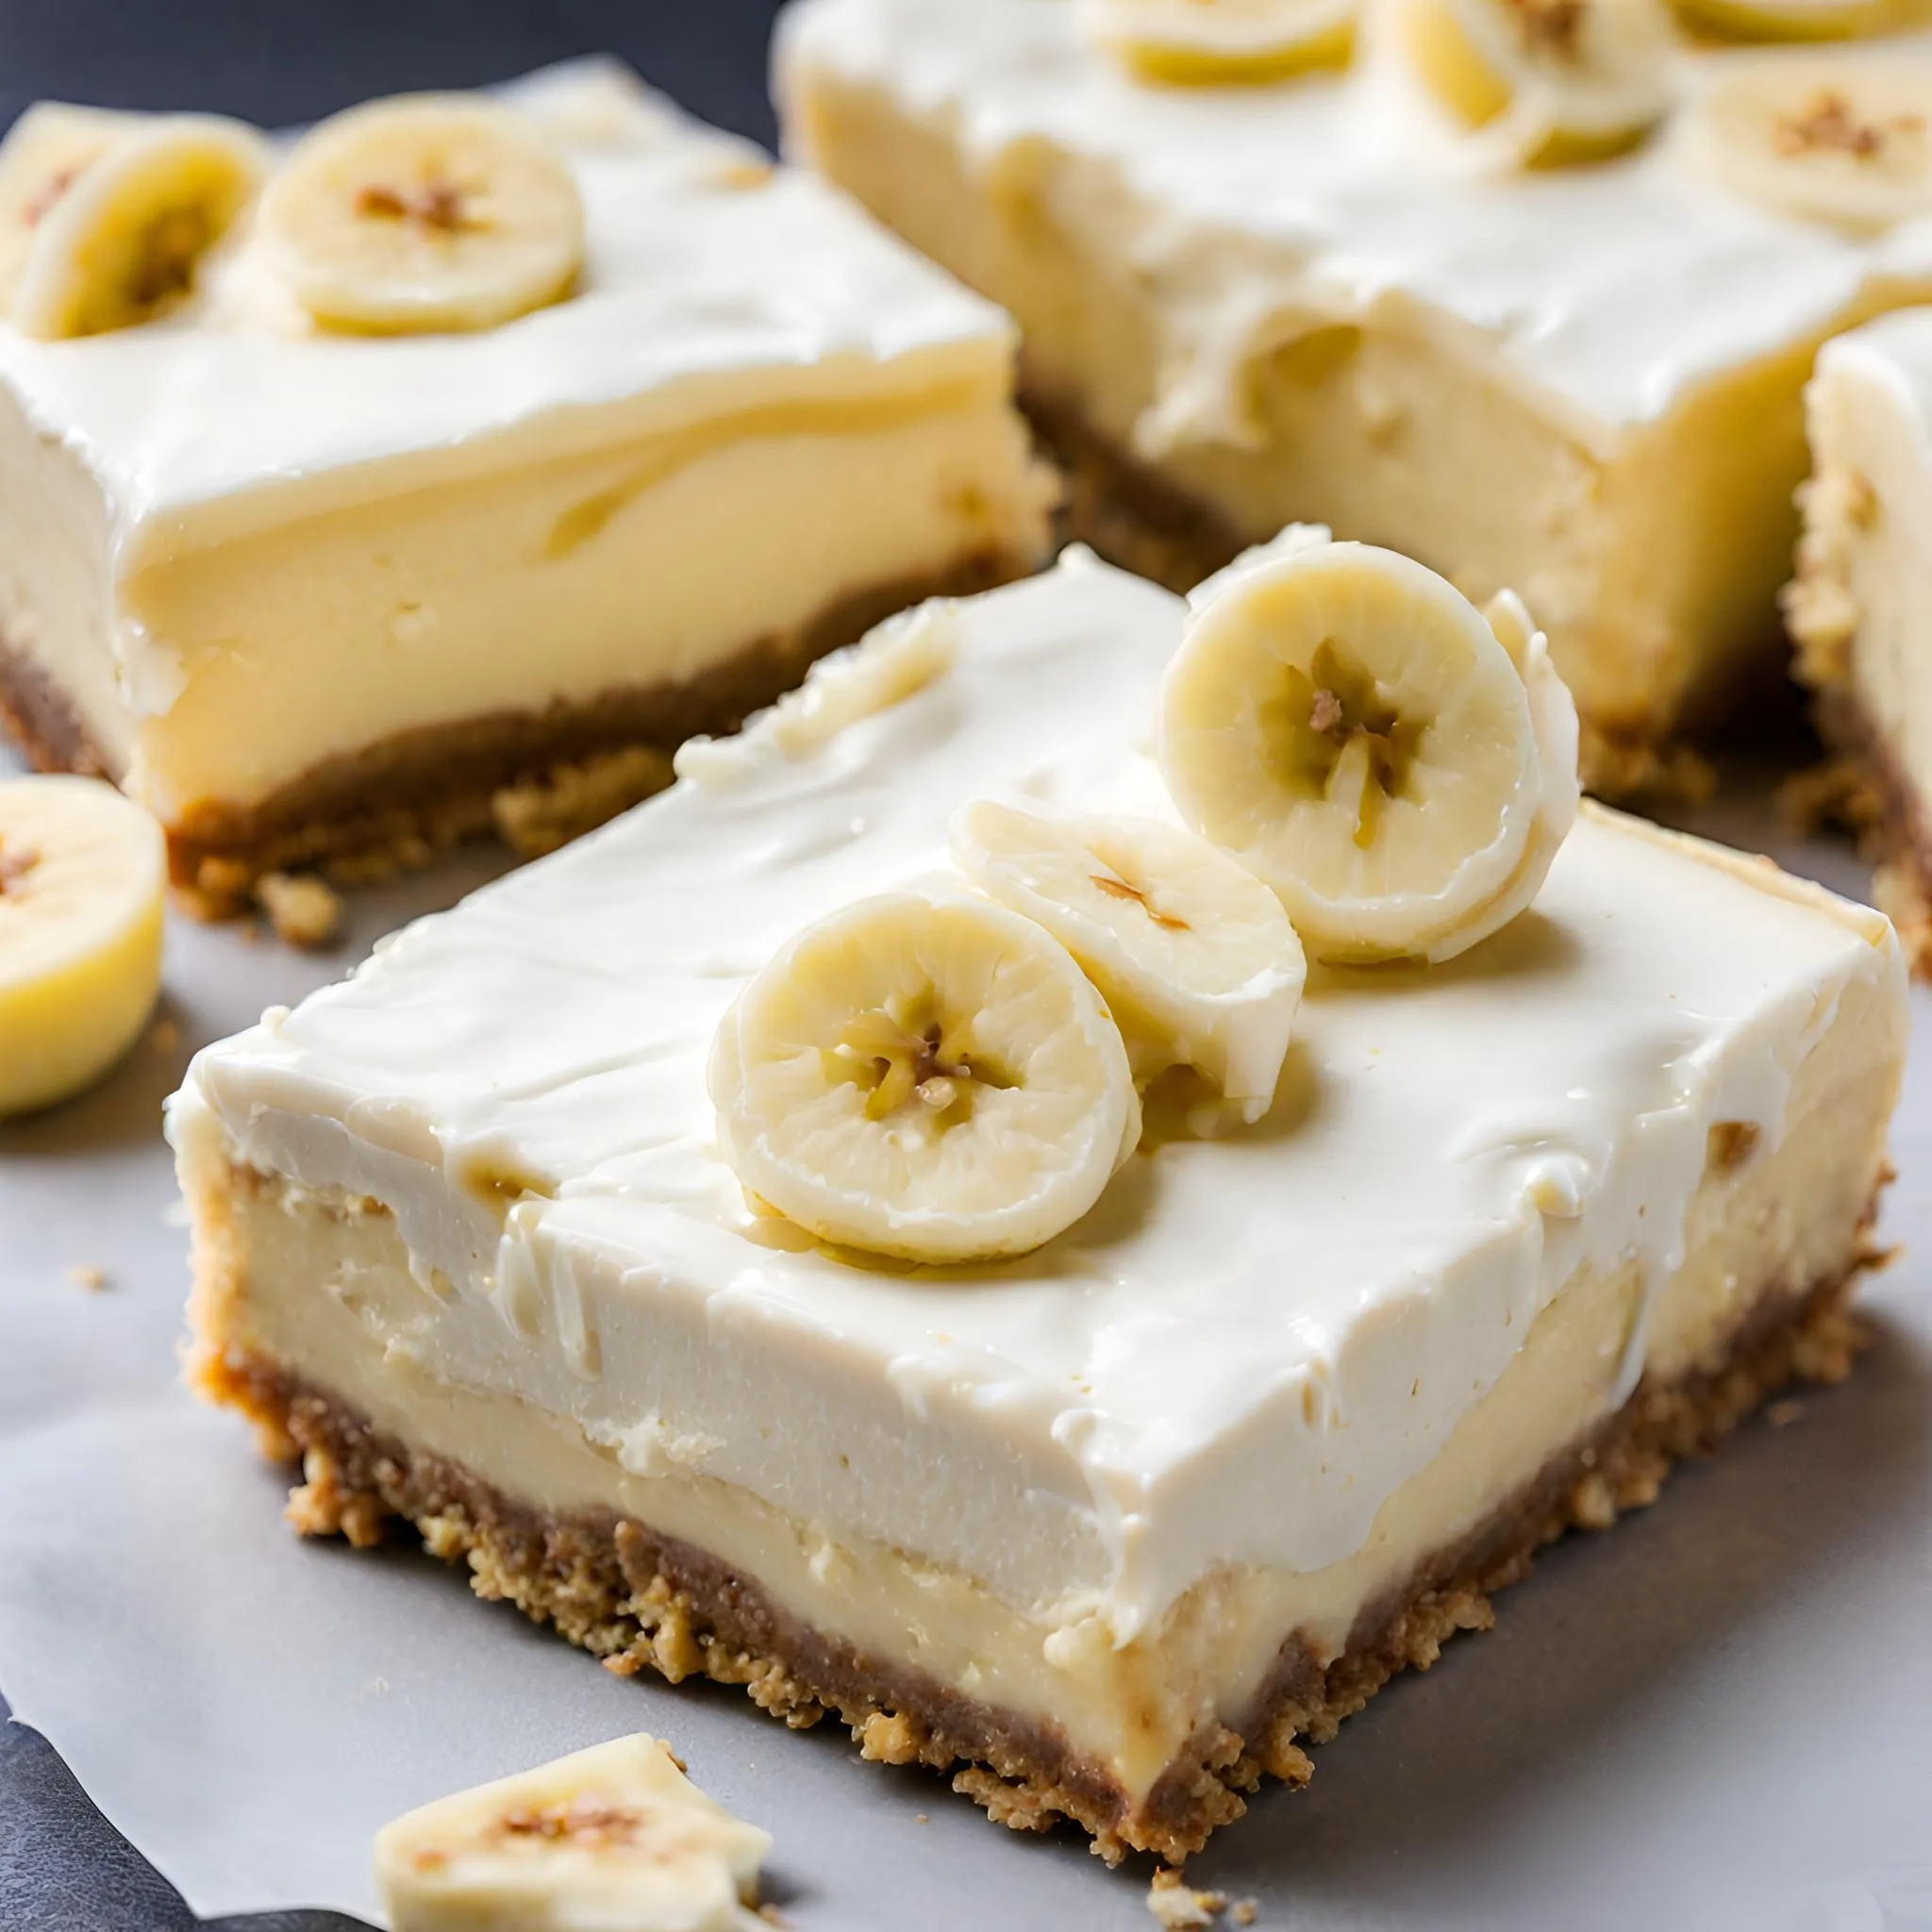
In conclusion, these Banana Cream Cheese Cheesecake Bars are not just a dessert; they’re an experience. The creamy texture, combined with the delightful flavors of banana and cream cheese, make each bite a heavenly indulgence. Whether you’re a seasoned baker or a beginner, this recipe promises to be both enjoyable to make and a joy to eat. So, tie on your apron, and get ready to impress your taste buds and your guests with this sensational dessert!
FAQs
1. Can I use a different type of cookie for the crust?
Answer: Absolutely! While Nilla Wafers are recommended for their sweet flavor and perfect texture, you can experiment with other cookies like graham crackers or shortbread cookies. The key is to maintain the ratio of cookie crumbs to butter to ensure the crust holds together well.
2. Is it possible to make these cheesecake bars without an electric mixer?
Answer: Yes, it is possible, though it requires more effort. You can whip the heavy cream and blend the cream cheese mixture using a manual whisk or a hand mixer. However, achieving stiff peaks in the cream and a smooth texture in the cream cheese mixture might take longer and require more elbow grease.
3. How do I know when the cheesecake bars are set and ready to serve?
Answer: The cheesecake bars are ready when they have chilled in the refrigerator for at least 8 hours, preferably overnight. They should feel firm to the touch and not jiggle when the pan is gently shaken. Chilling them properly is crucial for them to set correctly.
4. Can these cheesecake bars be made gluten-free?
Answer: Yes, you can make this recipe gluten-free by using gluten-free cookies for the crust. Just ensure that the cookie crumbs you use are similar in texture to Nilla Wafers to achieve the desired crust consistency. Also, double-check that the other ingredients, like the pudding mix, are gluten-free.
📖 Recipe
Print
BANANA CREAM CHEESECAKE BARS
- Total Time: 8 hours 20 minutes
- Yield: 9 servings
- Diet: Vegetarian
Description
Indulge in the heavenly taste of Banana Cream Cheese Cheesecake Bars, an irresistible dessert that combines the creamy richness of cheesecake with the delightful sweetness of bananas.
Ingredients
3 cups Nilla Wafer cookie crumbs (approximately one 11-ounce box)
1/2 cup butter, melted
1 pint heavy whipping cream
3/4 cup sugar
24 ounces cream cheese (3 8-ounce packages), softened
2 packages instant banana cream pudding mix (3.4 ounces each)
Optional garnish: whipped topping and banana slices
Instructions
- Combine Nilla Wafer crumbs and melted butter; press into a lined 8×8-inch pan. Chill.
- Whip heavy cream and sugar to stiff peaks; set aside.
- Beat cream cheese smoothly, then gradually add pudding mix.
- Fold whipped cream into cream cheese mixture.
- Spread over crust and refrigerate for 8 hours.
- Cut into squares, garnish with whipped topping and banana slices, and serve chilled.
Notes
Substitute Nilla Wafers with graham crackers or shortbread cookies for a different crust flavor.
For a gluten-free option, use gluten-free cookie crumbs.
Ensure cheesecake bars are thoroughly chilled before serving for best texture.
- Prep Time: 20 minutes
- Cook Time: 8 hours
- Category: Dessert
- Method: No Bake, Refrigeration
- Cuisine: American


