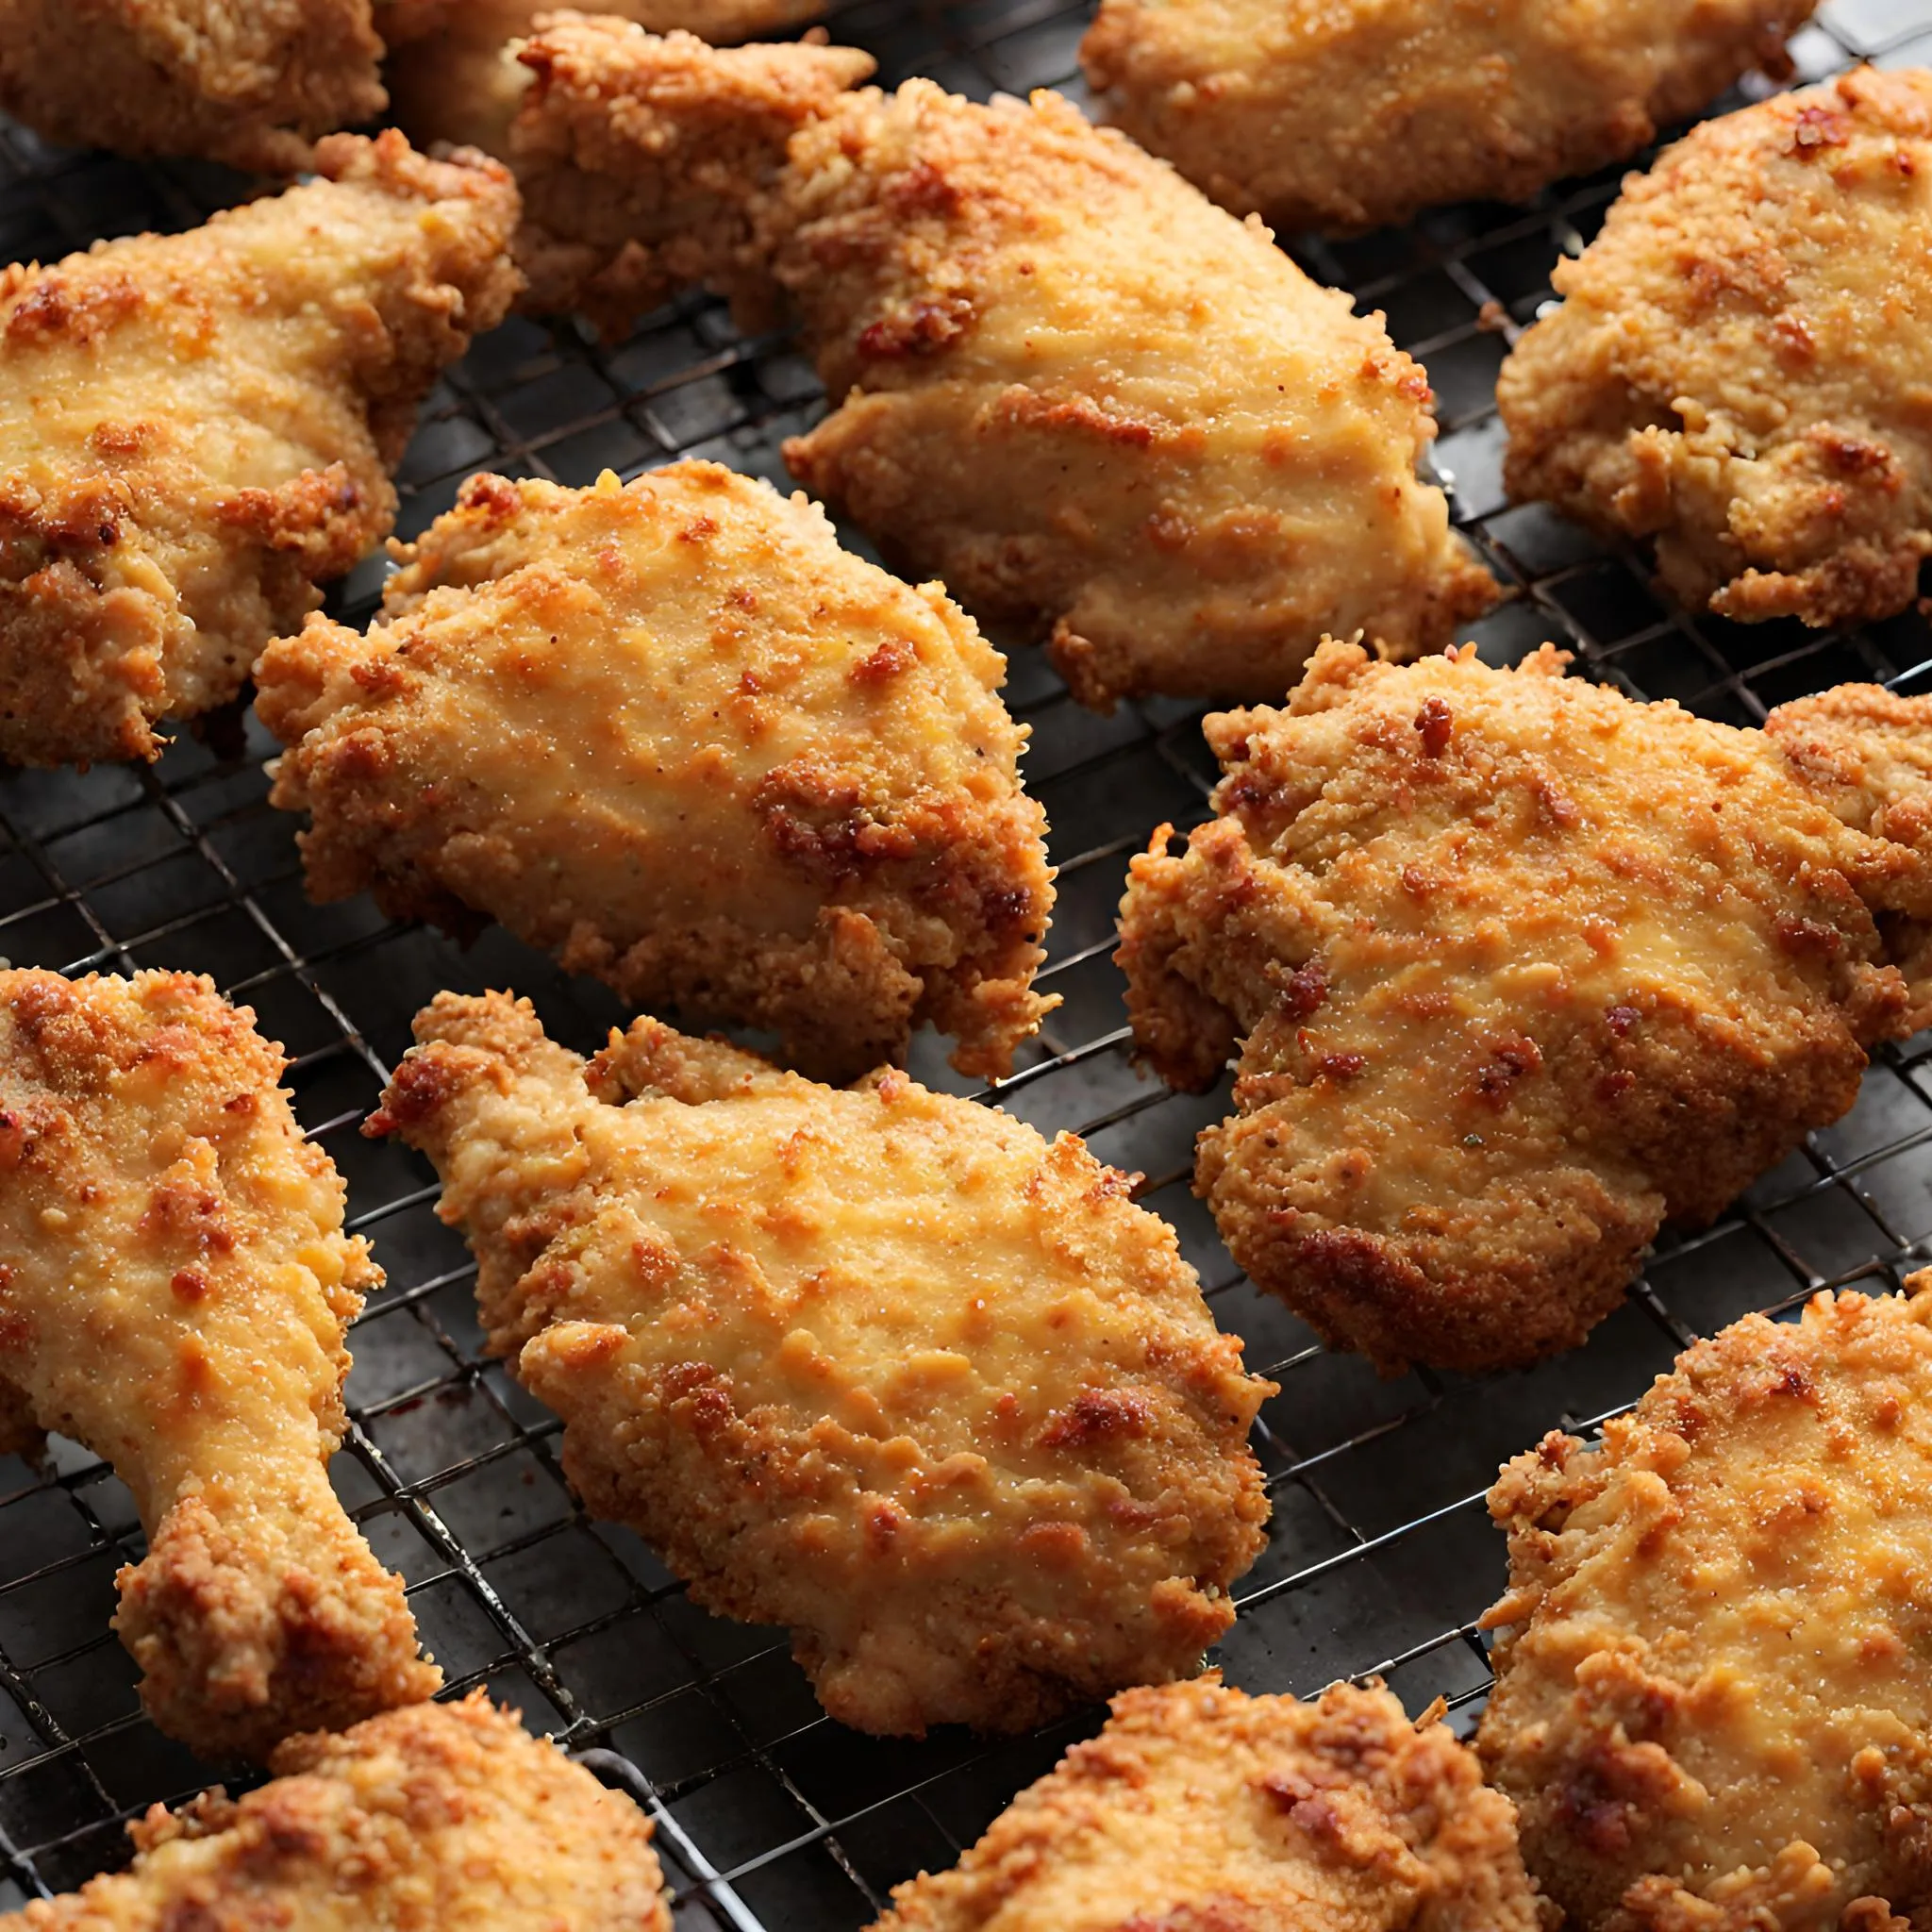
Are you craving the irresistible crunch of fried chicken but dread the idea of deep frying? Our Buttermilk Oven-Fried Chicken recipe offers the perfect solution, delivering all the satisfying texture and flavor of fried chicken with a fraction of the fat. This recipe is not only simple to prepare but also a healthier alternative to traditional frying methods. Let’s dive into the details of this mouthwatering dish that’s sure to become a family favorite.
Ingredients:
- 1 Chicken, cut up
- 3 cups all-purpose flour
- 2 teaspoons garlic pepper
- 1 teaspoon sugar
- 2 teaspoons paprika
- 1 cup buttermilk
- 2 eggs
- 1 teaspoon baking powder
- 3/4 teaspoon baking soda
- Olive oil
Directions:
1. Preheat and Prepare
Begin by preheating your oven to 350 degrees. This optimal temperature ensures your chicken cooks through evenly while achieving a golden, crispy exterior.
2. Mix Dry Ingredients
In a baking pan, combine the all-purpose flour, garlic pepper, sugar, and paprika. This mixture will be the key to your chicken’s flavorful, crispy coating. The blend of spices adds depth, while the sugar provides a hint of sweetness that complements the chicken’s savory notes.
3. Combine Wet Ingredients
In a medium-sized bowl, whisk together the buttermilk, eggs, baking powder, and baking soda until smooth. The buttermilk tenderizes the chicken, ensuring it remains juicy and flavorful during baking. The addition of baking powder and baking soda helps create a lighter, crispier coating.
4. Coat the Chicken
Dip each piece of chicken into the buttermilk mixture, allowing excess to drip off. Then, thoroughly roll in the flour mixture. For an extra-crispy texture, dip and coat each piece a second time in both the buttermilk and flour mixtures.
5. Bake to Perfection
Arrange the coated chicken pieces in the baking pan and lightly drizzle with olive oil. This not only adds flavor but also helps achieve that desirable crispy finish. Bake for approximately 50-55 minutes, or until the chicken is golden and cooked through.
Related Recipes:
Serving and Storage Tips for Buttermilk Oven-Fried Chicken

Enjoying your Buttermilk Oven-Fried Chicken at its best requires a few tips on serving and storing. Whether you’re serving it fresh out of the oven or saving leftovers for later, these suggestions will help you maintain the deliciousness and safety of your dish.
Serving Tips:
- Let it Rest: After removing the chicken from the oven, let it rest for a few minutes. This allows the juices to redistribute, ensuring each bite is moist and flavorful.
- Serve Warm: Oven-fried chicken is best enjoyed warm. If it has cooled down too much before serving, you can reheat it in the oven at a low temperature (about 300 degrees) for a few minutes.
- Accompaniments: Complement your chicken with sides that offer a contrast in texture and flavor. Light, fresh salads or steamed vegetables work well to balance the richness of the chicken. A tangy dipping sauce or a drizzle of honey can also enhance the flavors.
Storage Tips:
- Cool Before Storing: Allow the chicken to cool completely before storing. Placing warm chicken in a container and then in the refrigerator can cause condensation, making the coating soggy.
- Refrigerate Properly: Store leftover chicken in an airtight container in the refrigerator. Properly stored, it will last for 3 to 4 days.
- Freezing for Longer Storage: If you want to keep the chicken for longer, freeze it in a single layer on a baking sheet before transferring it to a freezer-safe bag or container. This prevents the pieces from sticking together, allowing you to thaw only what you need. Frozen chicken can last up to 4 months.
- Reheating: To maintain the crispiness, reheat leftover chicken in the oven at 375 degrees until it’s heated through and the coating is crisp again. You can also use an air fryer to revive the crispiness. Microwave reheating is not recommended as it tends to make the coating soggy.
Keeping it Crispy:
One of the biggest challenges with oven-fried chicken is keeping the coating crispy, especially when storing and reheating. Here are a few extra tips:
- Avoid Stacking: When storing, try not to stack the chicken pieces on top of each other, as this can make the coating become soft.
- Use a Wire Rack: If reheating in the oven, place the chicken on a wire rack over a baking sheet. This allows hot air to circulate around the chicken, crisping the coating evenly.
By following these serving and storage tips, you can enjoy your Buttermilk Oven-Fried Chicken to its fullest, whether it’s freshly made or saved for later. Happy eating!
FAQs
1. Can I use boneless chicken instead of bone-in for this recipe?
Yes, you can use boneless chicken pieces for this recipe. Keep in mind that boneless chicken cooks faster than bone-in, so you’ll need to adjust the cooking time accordingly. Typically, boneless chicken breasts or thighs will require about 20-30 minutes in the oven at 350 degrees, or until the internal temperature reaches 165 degrees Fahrenheit. Remember to check for doneness using a meat thermometer to ensure it’s cooked through.
2. How can I make this recipe gluten-free?
To make a gluten-free version of Buttermilk Oven-Fried Chicken, you can substitute the all-purpose flour with a gluten-free flour blend. Look for a blend that’s designed to be a direct replacement for all-purpose flour to ensure the coating has the right texture. Additionally, check the labels on your other ingredients, such as baking powder, to confirm they’re gluten-free.
3. Is there a dairy-free alternative to buttermilk in this recipe?
Yes, for a dairy-free alternative, you can make your own buttermilk substitute by mixing 1 cup of a dairy-free milk (like almond milk, soy milk, or coconut milk) with 1 tablespoon of lemon juice or white vinegar. Let the mixture sit for 5-10 minutes until it thickens slightly and curdles, then use it in place of buttermilk in the recipe.
4. Can I prepare this chicken in advance?
You can prepare the chicken up to the point of baking and store it in the refrigerator for several hours or overnight before baking. This can help the buttermilk and seasoning flavors to penetrate the chicken more deeply. If you choose to do this, cover the coated chicken loosely with plastic wrap and refrigerate. Before baking, let the chicken sit at room temperature for about 20 minutes to take the chill off, which helps it cook more evenly. However, for the crispiest results, it’s best to coat and bake the chicken when you’re ready to eat. Freezing the coated, uncooked chicken is not recommended as the coating may become soggy when thawed and baked.
Conclusion
Our Buttermilk Oven-Fried Chicken recipe is proof that you don’t have to sacrifice flavor for health. With its crispy, golden exterior and juicy interior, this oven-fried chicken is a delightful alternative to traditional fried chicken. Easy to make and irresistibly delicious, it’s the perfect dish for any occasion. So why not give it a try? You might just discover your new go-to recipe for satisfying those fried chicken cravings without the guilt.
Remember, cooking is not just about following a recipe but about making it your own. Feel free to experiment with different spices or add a personal touch to make this dish uniquely yours. Happy cooking!
📖 Recipe
Print
Buttermilk Oven-Fried Chicken
- Total Time: 1 hour 15 minutes
- Yield: Serves 4-6
Description
Discover the secret to making crispy, golden, and deliciously juicy Buttermilk Oven-Fried Chicken with our easy-to-follow recipe. Perfect for those seeking a healthier alternative to traditional fried chicken, this recipe delivers all the flavors and textures you love without the excess oil.
Ingredients
1 Chicken, cut up
3 cups all-purpose flour
2 teaspoons garlic pepper
1 teaspoon sugar
2 teaspoons paprika
1 cup buttermilk
2 eggs
1 teaspoon baking powder
3/4 teaspoon baking soda
Olive oil
Instructions
- Preheat the oven to 350 degrees.
- Mix the flour, garlic pepper, sugar, and paprika in a baking pan.
- Whisk together buttermilk, eggs, baking powder, and baking soda in a bowl.
- Dip each chicken piece in the buttermilk mixture, then coat in the flour mixture. Repeat for a double coating.
- Place coated chicken in a baking pan, drizzle with olive oil, and bake for 50-55 minutes until golden.
Notes
For extra crispiness, allow the coated chicken to sit on a wire rack for a few minutes before baking.
If using boneless chicken, adjust cooking time to 20-30 minutes or until fully cooked.
Substitute all-purpose flour with a gluten-free blend for a gluten-free version.
- Prep Time: 20 minutes
- Cook Time: 55 minutes
- Category: Main Course
- Method: Baking
- Cuisine: American


