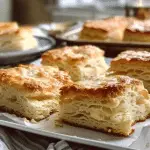
Are you craving something cheesy, garlicky, and irresistibly delicious? Look no further than this homemade cheesy garlic breadsticks recipe. It’s the perfect side dish for your next family dinner or gathering with friends. Not only is it simple to make, but it also brings a burst of flavor that complements any main course. Let’s dive into how you can create this mouthwatering treat right in your own kitchen.
Ingredients You’ll Need:
- 1 tube refrigerated pizza crust: This is your base, offering a convenient and time-saving option without sacrificing taste.
- 1 tsp melted butter: Adds richness and helps to evenly spread the garlic flavor.
- 1 crushed garlic clove: The star ingredient that provides the signature garlicky zing.
- 3/4 cup shredded mozzarella cheese: Feel free to add more for extra cheesiness!
- 1 tsp parmesan cheese: Brings a slightly nutty and salty flavor, enhancing the overall taste.
- 1 teaspoon dried oregano leaves (optional): Adds a hint of herbiness, complementing the garlic and cheeses beautifully.
Easy Step-by-Step Instructions:
- Preheat Your Oven: Start by heating your oven to 425 Fahrenheit. This high temperature is key to achieving that slightly golden, perfectly melted cheese topping.
- Prepare the Pizza Crust: Unroll the tube of refrigerated pizza crust onto a baking tray lined with parchment paper. This not only prevents sticking but also makes cleanup a breeze.
- Mix Butter and Garlic: In a small bowl, combine the melted butter and crushed garlic. This mixture will infuse the breadsticks with a rich, garlicky flavor that’s hard to resist.
- Apply the Garlic Butter: Spread the garlic butter mixture evenly over the entire surface of the pizza crust. Make sure every inch is covered to ensure a uniform flavor.
- Add the Cheeses: Sprinkle the shredded mozzarella and Parmesan cheese over the crust. The combination of these two cheeses provides a perfect melt and a depth of flavor.
- Sprinkle Oregano: If using, evenly sprinkle dried oregano over the cheese. This adds an extra layer of aroma and taste that elevates the breadsticks.
- Pre-Cut the Breadsticks: Before baking, cut the pizza crust into 16 equal rectangles. This pre-cutting makes it easier to serve and enjoy after baking.
- Bake to Perfection: Place the tray in the oven and bake for about 12 minutes. You’re looking for the cheese to melt and turn slightly golden—signs of perfect cheesy garlic breadsticks.
- Final Cut: Once out of the oven, cut along the pre-cut lines again. This ensures that each breadstick is easy to separate and serve.
Serve and Enjoy!
Your homemade cheesy garlic breadsticks are now ready to be devoured. They’re best served warm, with the cheese still gooey and the bread slightly crisp. Pair them with your favorite pasta dish, soup, or salad for a complete meal that’s sure to impress.
In conclusion, this cheesy garlic breadsticks recipe is a straightforward and delicious way to add a homemade touch to your meals. With just a few ingredients and minimal prep time, you can create a side dish that’s both satisfying and flavorful. Give it a try and watch these breadsticks disappear before your eyes!
Related Recipes:
Serving and Storage Tips
To ensure your homemade cheesy garlic breadsticks remain as delicious as when they first come out of the oven, following the right serving and storage tips is key. These breadsticks are best enjoyed warm, but with a little know-how, you can keep them tasting great even as leftovers.
Serving Tips:
- Serve Warm: Cheesy garlic breadsticks are most flavorful when warm. If they’ve cooled down, you can quickly reheat them in the oven at 350 Fahrenheit for about 5 minutes or until they’re warm and the cheese is gooey again.
- Pairing: These breadsticks pair wonderfully with a variety of dishes. Serve them alongside a hearty pasta, a fresh salad, or a warm soup to elevate any meal.
- Dipping Sauces: Offer dipping sauces such as marinara, ranch, or garlic butter on the side for an extra flavor boost. This not only enhances the tasting experience but also adds a fun, interactive element to your meal.
Storage Tips:
- Cool Before Storing: Allow the breadsticks to cool completely before storing. This prevents condensation inside the container, which can make the breadsticks soggy.
- Airtight Container: Store the cooled breadsticks in an airtight container. This keeps them from drying out and helps maintain their flavor and texture.
- Refrigeration: If you plan to keep them for more than a day, it’s best to refrigerate the breadsticks. They can last in the fridge for up to 3-4 days.
- Freezing: For longer storage, you can freeze the breadsticks. Wrap them individually in foil or plastic wrap, then place them in a freezer bag. They can be frozen for up to a month. When you’re ready to enjoy, reheat them directly from frozen in the oven.
Reheating Tips:
- Oven is Best: Reheat refrigerated or frozen breadsticks in the oven to best preserve their texture. Preheat your oven to 350 Fahrenheit and bake the breadsticks until they’re heated through and the cheese is bubbly, about 5-10 minutes for refrigerated ones and a little longer for frozen.
- Avoid the Microwave: While quick, microwaving can make the breadsticks chewy and the cheese rubbery. If you must use the microwave, do so in short intervals and at a lower power setting to avoid overheating.
By following these serving and storage tips, you can enjoy your homemade cheesy garlic breadsticks at their best, whether fresh out of the oven or as a tasty snack the next day.
FAQs
Can I use homemade pizza dough instead of refrigerated pizza crust?
Answer: Absolutely! Homemade pizza dough can be used as a substitute for refrigerated pizza crust and often adds a personal touch to your cheesy garlic breadsticks. If you choose to use homemade dough, make sure it’s rolled out to a similar thickness as the store-bought crust to ensure even baking and optimal cheese melting. Allow the dough to rise as needed before adding the toppings and baking.
How can I make my cheesy garlic breadsticks gluten-free?
Answer: To make gluten-free cheesy garlic breadsticks, simply replace the regular pizza crust with a gluten-free pizza dough option. Many stores offer gluten-free refrigerated pizza dough, or you can make your own using gluten-free flour blends. Just be sure to check the labels of all other ingredients to ensure they’re gluten-free, especially the cheeses and any seasonings.
What other cheeses can I use for the breadsticks?
Answer: While mozzarella and Parmesan are classic choices for their meltability and flavor, you’re not limited to these options. Feel free to experiment with other cheeses such as cheddar for a sharper taste, provolone for a smoother melt, or a mix of Italian cheeses for a more complex flavor profile. Just make sure the cheeses you choose melt well to achieve that irresistible cheesy pull.
Can I add toppings to my cheesy garlic breadsticks?
Answer: Yes, you can personalize your breadsticks by adding various toppings before baking. Some popular options include sliced olives, diced bell peppers, caramelized onions, or even a sprinkle of chili flakes for a spicy kick. Just remember to add these toppings after the garlic butter and before the cheese to ensure they stick and are nicely enveloped by the melting cheese.
📖 Recipe
Print
Homemade Cheesy Garlic Breadsticks Recipe
- Total Time: 22 minutes
- Yield: 16 breadsticks
- Diet: Vegetarian
Description
Indulge in the ultimate comfort food with our Homemade Cheesy Garlic Breadsticks Recipe. Perfectly golden and bursting with cheese, these breadsticks are a delightful blend of gooey mozzarella, aromatic garlic, and a hint of Parmesan.
Ingredients
1 tube refrigerated pizza crust
1 tsp melted butter
1 crushed garlic clove
3/4 cup shredded mozzarella cheese (add more for extra cheesiness)
1 tsp parmesan cheese
1 teaspoon dried oregano leaves (optional)
Instructions
- Preheat the oven to 425°F and line a baking tray with parchment paper.
- Roll out the pizza crust on the prepared tray.
- Mix the melted butter and garlic, then spread over the crust.
- Sprinkle with mozzarella, Parmesan, and oregano if using.
- Cut into rectangles, then bake for 12 minutes until golden.
- Recut and serve warm.
Notes
Feel free to add more cheese if desired.
Homemade pizza dough can be substituted for a more personalized touch.
Store leftovers in an airtight container; reheat in the oven for best results.
- Prep Time: 10 minutes
- Cook Time: 12 minutes
- Category: Side Dish
- Method: Baking
- Cuisine: Italian


