
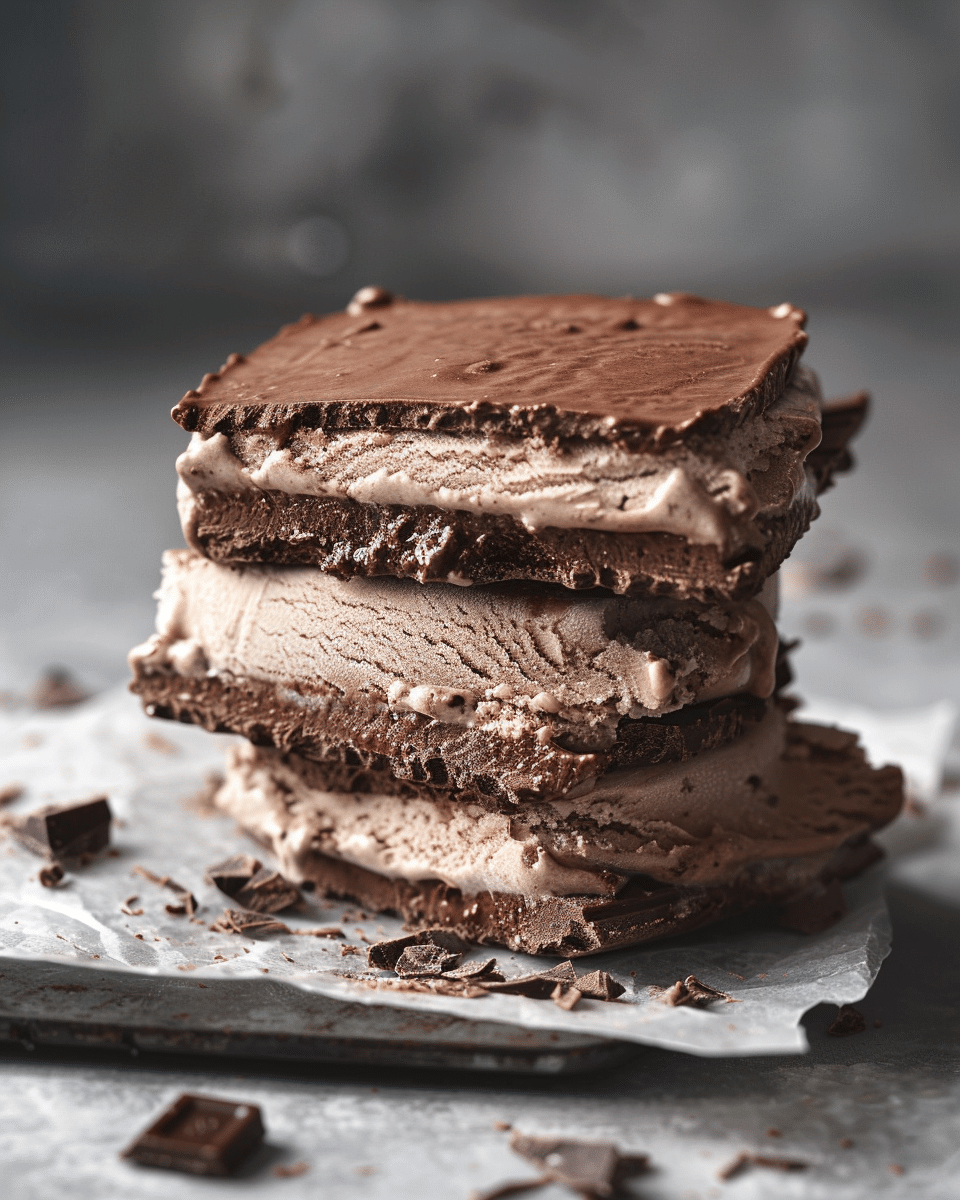
I love how this Classic Chocolate Ice Cream Sandwich brings together soft, chewy cocoa cookies and creamy vanilla ice cream in one nostalgic frozen dessert. It gives me that old-school ice cream truck feeling, but I can make it fresh at home with simple ingredients and an easy method.
Why You’ll Love This Recipe
I love this recipe because it feels both familiar and homemade at the same time. The chocolate cookies stay soft and tender, which makes them perfect for sandwiching around cold vanilla ice cream without turning too hard to bite. I also like that the ingredient list is simple and the steps are easy to follow, so I can make a fun frozen dessert without too much effort. Another reason I keep coming back to this recipe is that it works well for family desserts, summer gatherings, or anytime I want a sweet treat that feels a little nostalgic.
Ingredients
(Tip: You’ll find the full list of ingredients and measurements in the recipe card below.)
Vegetable oil cooking spray
1/2 cup all-purpose flour
1 tablespoon all-purpose flour
1/4 teaspoon kosher salt
1/4 teaspoon baking soda
1/3 cup sifted Dutch-process cocoa powder
3 tablespoons unsalted butter, softened
1/4 cup white sugar
2 tablespoons light brown sugar
1/2 teaspoon pure vanilla extract
1/3 cup whole milk, at room temperature
6 scoops vanilla ice cream
Directions
I start by preheating the oven to 350°F (175°C). I line a baking sheet with a silicone baking mat, then coat it lightly with vegetable oil cooking spray and rub it over the surface so everything is evenly covered.
In one bowl, I whisk together the flour, salt, baking soda, and cocoa powder until the mixture is evenly combined. If I notice any lumps in the cocoa, I sift the mixture first so the batter stays smooth.
In a second bowl, I mix the softened butter, white sugar, brown sugar, and vanilla until smooth. Then I add the dry ingredients and the milk, stirring until I get a thick, smooth batter. I scoop 12 portions onto the prepared baking sheet.
I bake the cookies for 9 to 10 minutes, just until the tops no longer look glossy or wet. When I take the pan out of the oven, I tap it firmly on the counter several times to flatten and settle the cookies. Then I let them cool on the pan for about 15 minutes.
Next, I place the baking sheet in the freezer for about 15 minutes until the cookies are firm. I carefully lift the cookies from the mat, then poke 10 to 12 small holes in each one with the tip of a chopstick or a similar tool. After that, I return them to the freezer until I am ready to assemble the sandwiches.
To assemble, I place one cookie upside down, add a scoop of vanilla ice cream, and top it with a second cookie. I can serve them right away, or I can wrap and freeze them for about 3 hours if I want that more classic ice cream sandwich texture. I repeat the process with the remaining cookies and ice cream.
Servings and timing
I get 6 servings from this recipe.
I plan for 30 minutes of prep time, 10 minutes of cooking time, and about 70 minutes total. That total includes the cooling and chilling time needed to get the cookies ready for assembly.
Variations
I like changing this recipe in a few simple ways when I want a different flavor. I sometimes swap the vanilla ice cream for chocolate, coffee, mint chocolate chip, or cookies and cream. I also like rolling the edges in mini chocolate chips, sprinkles, or crushed cookies for a more playful finish. When I want a richer flavor, I add a little espresso powder to the cookie batter to deepen the chocolate taste. I can also make smaller sandwiches for bite-sized treats that are easy to serve at parties.
Storage/Reheating
I store the assembled ice cream sandwiches in the freezer, individually wrapped or in an airtight container, so they stay fresh and do not pick up freezer odors. I find they are best enjoyed within about 1 to 2 weeks for the best texture and flavor.
I do not reheat these, since they are meant to be served frozen. If they are too firm straight from the freezer, I let them sit at room temperature for a couple of minutes so the cookies and ice cream soften slightly before serving.
Related Recipes:
FAQs
Can I make the cookies ahead of time?
Yes, I can bake the cookies ahead of time and keep them in the freezer until I am ready to assemble the sandwiches. I find this makes the final assembly quicker and easier.
Why do I poke holes in the cookies?
I poke small holes in the cookies because it gives them that classic ice cream sandwich look. I also think it helps create the nostalgic style that makes this dessert feel extra special.
Can I use a different flavor of ice cream?
Yes, I can use almost any ice cream flavor I like. Vanilla is classic, but I also enjoy chocolate, strawberry, coffee, or cookies and cream in this recipe.
How do I keep the sandwiches neat when assembling?
I find it easiest to work quickly with very cold cookies and firm scoops of ice cream. I also like placing the assembled sandwiches back in the freezer right away so they hold their shape well.
Can I make these without a silicone baking mat?
Yes, I can use parchment paper if I do not have a silicone baking mat. I just make sure the surface is well prepared so the cookies release easily after baking and chilling.
Conclusion
I think this classic chocolate ice cream sandwich is one of the most satisfying homemade frozen desserts I can make. It is simple, nostalgic, and full of rich chocolate flavor balanced by creamy vanilla ice cream. Whenever I want a dessert that feels fun, familiar, and perfect for sharing, this is a recipe I love to make.
📖 Recipe:
Print
Classic Chocolate Ice Cream Sandwich
5 Stars 4 Stars 3 Stars 2 Stars 1 Star
No reviews
- Author: Isabella
- Total Time: 70 minutes
- Yield: 6 servings
- Diet: Vegetarian
Description
A nostalgic frozen treat featuring soft chocolate cookies sandwiching creamy vanilla ice cream. Easy to make at home with simple ingredients and a chewy, bite-friendly texture.
Ingredients
Vegetable oil cooking spray
1/2 cup all-purpose flour
1 tablespoon all-purpose flour
1/4 teaspoon kosher salt
1/4 teaspoon baking soda
1/3 cup sifted Dutch-process cocoa powder
3 tablespoons unsalted butter, softened
1/4 cup white sugar
2 tablespoons light brown sugar
1/2 teaspoon pure vanilla extract
1/3 cup whole milk, at room temperature
6 scoops vanilla ice cream
Instructions
- Preheat oven to 350°F (175°C). Line a baking sheet with a silicone mat or parchment paper and lightly coat with vegetable oil spray.
- In a bowl, whisk together flour, salt, baking soda, and cocoa powder until smooth and lump-free.
- In another bowl, mix butter, white sugar, brown sugar, and vanilla until smooth. Add dry ingredients and milk, stirring into a thick batter.
- Scoop 12 portions onto the prepared baking sheet.
- Bake for 9–10 minutes until tops are no longer glossy. Tap the pan on the counter to flatten cookies and cool for 15 minutes.
- Freeze cookies on the baking sheet for 15 minutes until firm.
- Remove cookies, poke 10–12 small holes in each, then return to freezer until ready to assemble.
- Place one cookie upside down, add a scoop of ice cream, and top with another cookie. Repeat for all sandwiches.
- Serve immediately or wrap and freeze for about 3 hours for a firmer texture.
Notes
Swap vanilla ice cream with chocolate, mint, coffee, or cookies and cream for variation.
Roll edges in sprinkles, mini chocolate chips, or crushed cookies for extra texture.
Add a pinch of espresso powder to deepen chocolate flavor.
Store wrapped sandwiches in an airtight container in the freezer for up to 2 weeks.
Let sit at room temperature for a few minutes before serving if too firm.
- Prep Time: 30 minutes
- Cook Time: 10 minutes
- Category: Dessert
- Method: Baking and Freezing
- Cuisine: American
Nutrition
- Serving Size: 1 sandwich
- Calories: 320 kcal
- Sugar: 22 g
- Sodium: 150 mg
- Fat: 16 g
- Saturated Fat: 9 g
- Unsaturated Fat: 6 g
- Trans Fat: 0 g
- Carbohydrates: 40 g
- Fiber: 2 g
- Protein: 5 g
- Cholesterol: 35 mg


