Ingredients:
1/2 cup semisweet or dark chocolate, chopped
10-12 pesticide-free, non-toxic leaves (rose, mint, lemon, or camellia leaves work well)
Directions:
Prepare the Leaves:
Start by choosing non-toxic, pesticide-free leaves to ensure safety when handling and consuming. Rose, mint, lemon, and camellia leaves are all great options because of their sturdy structure. Thoroughly wash and dry the leaves, ensuring they are clean and dry before you begin.
Melt the Chocolate:
Melt the chopped chocolate using a double boiler or microwave. If using the microwave, heat the chocolate at 50% power in 30-second intervals, stirring between each interval until smooth and fully melted. The chocolate should have a silky texture and be free of lumps.
Brush the Leaves:
Using a clean pastry brush, coat the underside of each leaf with a generous amount of melted chocolate. Be sure to apply the chocolate evenly and coat the veins, as they will add texture to your chocolate leaf. Avoid brushing the top side, as it’s too smooth to hold the chocolate well.
Chill the Leaves:
Once coated, place the chocolate-covered leaves on a parchment-lined baking sheet. Refrigerate them for 20-30 minutes, or until the chocolate is firm and fully set.
Peel Off the Leaves:
Carefully peel the real leaves away from the hardened chocolate, starting from the stem end. Work slowly to avoid breaking the delicate chocolate. You will be left with a beautiful, thin replica of the original leaf, ready for decoration.
Decorate and Serve:
Use your chocolate leaves to decorate cakes, cupcakes, or any other dessert that could use a touch of elegance. Store them in a cool, dry place until you’re ready to use them.
Serving Tips:
Placement:
On Desserts: Place chocolate leaves on top of frosted cakes or cupcakes just before serving to keep them looking fresh and appealing.
With Other Garnishes: Pair them with fresh fruit, edible flowers, or whipped cream for a stunning presentation.
Temperature:
Serve desserts with chocolate leaves at room temperature to enhance the texture and flavor of the chocolate. Cold chocolate can be brittle and may break easily.
Staging:
Arrange chocolate leaves artistically on platters or as part of dessert tables. Consider using varying sizes and orientations for visual interest.
Freshness:
To retain the visual appeal, avoid exposing chocolate leaves to direct sunlight or heat sources, as this can cause the chocolate to soften or melt.
Storage Tips:
Cool and Dry Place:
Store chocolate leaves in a cool, dry location away from direct sunlight, which can cause melting or discoloration. A cupboard or pantry works well.
Air-Tight Container:
Place the leaves in an airtight container or between layers of parchment paper to protect them from moisture and air exposure, which can affect their texture and taste.
Refrigeration:
If you live in a particularly warm climate, you can refrigerate chocolate leaves for short-term storage. Just be sure to place them in an airtight container to prevent moisture absorption. When ready to use, allow them to come to room temperature before serving.
Avoid Stacking:
If storing multiple chocolate leaves, avoid stacking them directly on top of one another to prevent them from sticking together. Use parchment paper between layers to keep them separate.
Usage Timeframe:
For the best flavor and texture, use chocolate leaves within one week of making them. Over time, the chocolate may lose its shine and become dull.
Related Recipes:
FAQs:
Conclusion:
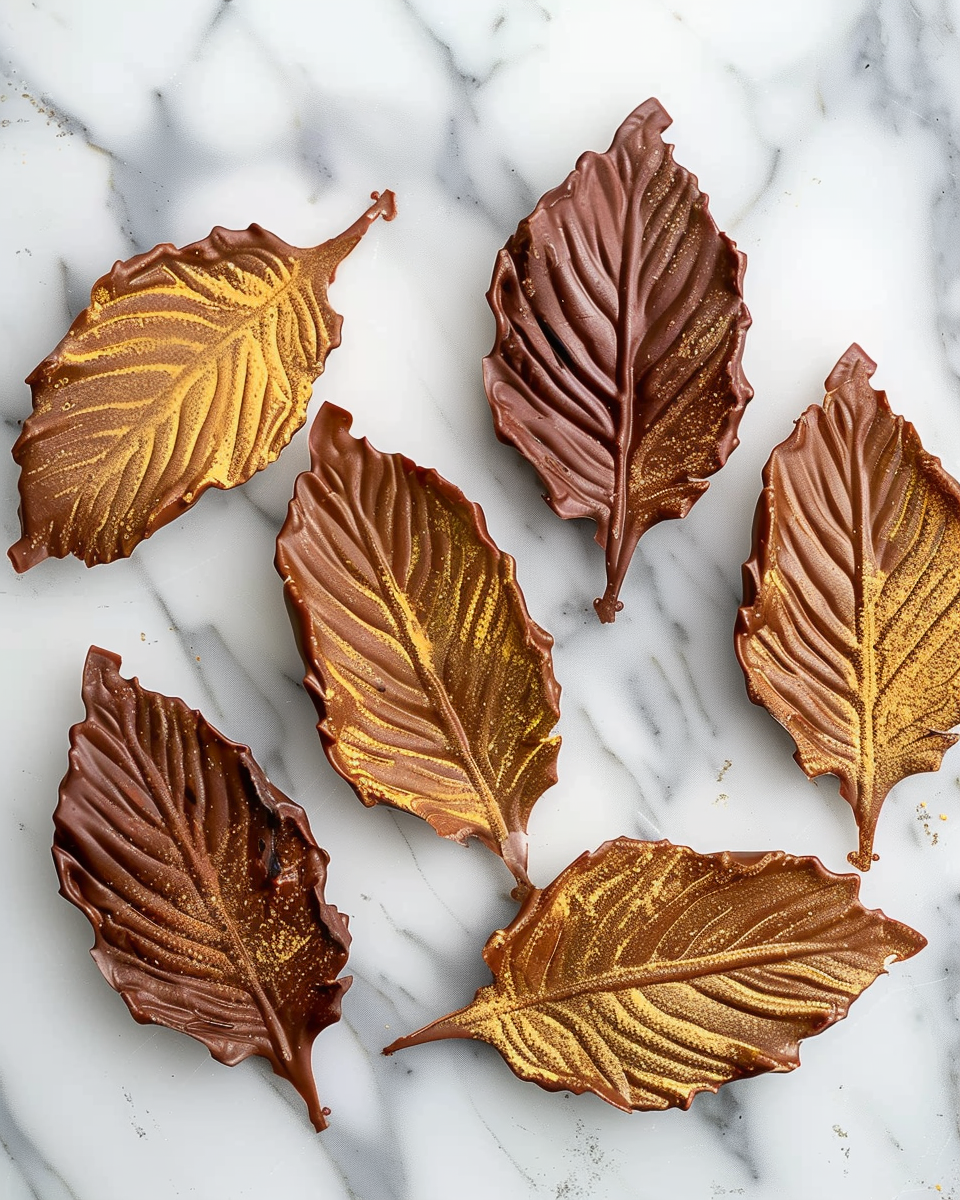
Learning how to make chocolate leaves is a simple and fun way to elevate your desserts. These beautiful, edible decorations are sure to impress your guests and give your cakes or cupcakes a professional look. With minimal ingredients and effort, you’ll create a stunning visual effect that complements any sweet treat. Try making chocolate leaves for your next special occasion, and watch your desserts come to life!
📖 Recipe:
Print
How to Make Chocolate Leaves
- Total Time: 40 minutes
- Yield: Approximately 10-12 chocolate leaves
- Diet: Vegetarian
Description
Create stunning and elegant desserts with chocolate leaves, an easy and beautiful decoration made by brushing melted chocolate onto real leaves. Perfect for cakes, cupcakes, and more, these delicate edible decorations will impress your guests and elevate your baking skills.
Ingredients
1/2 cup semisweet or dark chocolate, chopped
10–12 pesticide-free, non-toxic leaves (rose, mint, lemon, or camellia leaves work well)
Instructions
- Prepare the Leaves: Wash and dry the leaves thoroughly, ensuring they are free from pesticides and chemicals.
- Melt the Chocolate: Melt the chocolate in a heatproof bowl over a double boiler or in the microwave at 50% power in 30-second intervals, stirring until smooth.
- Brush the Leaves: Use a clean pastry brush to coat the underside of each leaf with a thick layer of melted chocolate.
- Chill the Leaves: Place the chocolate-coated leaves on a parchment-lined baking sheet and refrigerate for 20-30 minutes until set.
- Peel Off the Leaves: Gently peel the leaves away from the hardened chocolate, starting from the stem end.
- Decorate and Serve: Use the chocolate leaves to decorate desserts and store them in a cool, dry place until ready to use.
Notes
Choose sturdy leaves with prominent veins for better texture and detail.
Experiment with different types of chocolate for varied flavors and appearances.
Add edible shimmer dust for an elegant touch.
- Prep Time: 10 minutes
- Cook Time: 30 minutes
- Category: Dessert Decoration
- Method: No-Bake
- Cuisine: Universal (can be used in various dessert cuisines)
Nutrition
- Serving Size: Approximately 10-12 chocolate leaves