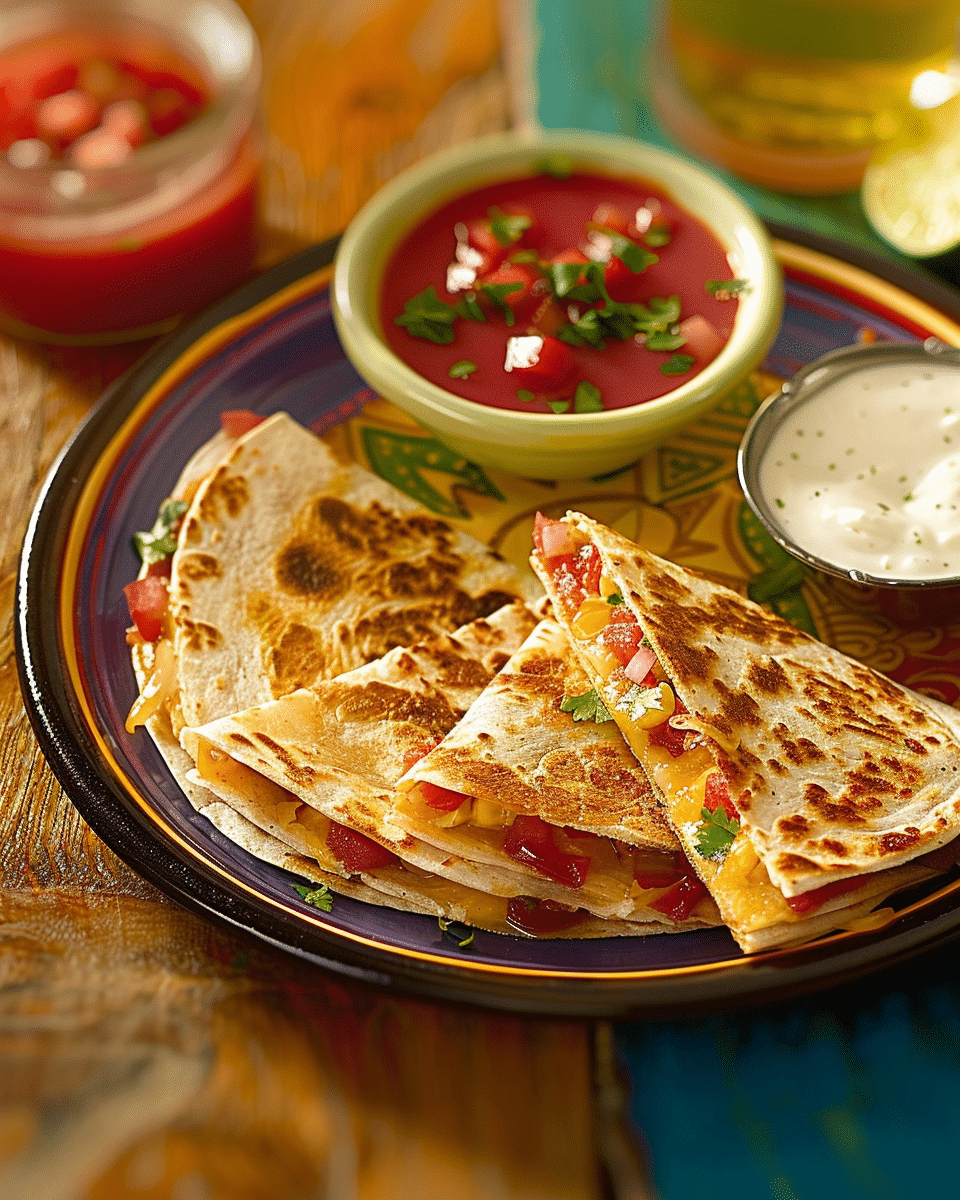
Looking for a simple yet satisfying meal or snack? These Quick Quesadillas are the perfect solution, combining cheesy goodness with your favorite fillings in just a few easy steps. Whether you’re cooking for a crowd or just need a quick meal for yourself, this recipe delivers on flavor and convenience.
Why You’ll Love This Recipe
I love making these Quick Quesadillas because they’re so versatile and easy to prepare. The cheese gets perfectly melted and gooey, while the combination of fresh veggies and optional protein adds just the right amount of flavor. Whether I’m using chicken, beef, or beans, I know this dish will always be a hit. Plus, they cook up in no time, making them the perfect choice for a weeknight dinner or a quick snack.
Ingredients:
4 large flour tortillas
2 cups shredded cheese (cheddar, Monterey Jack, or a blend)
1/2 cup diced onions
1 cup cooked and shredded chicken, beef, or beans (optional)
1/2 cup diced bell peppers (any color)
1/2 cup salsa
1/4 cup chopped cilantro (optional)
Salt and pepper to taste
Olive oil or cooking spray
(Tip: You’ll find the full list of ingredients and measurements in the recipe card below.)
Instructions
Prepare the Filling: In a bowl, I mix together shredded cheese, cooked and shredded chicken or beans (if using), diced bell peppers, diced onions, salsa, and chopped cilantro (if using). I make sure everything is well combined, adding salt and pepper to taste.
Assemble the Quesadillas: I place a tortilla on a flat surface and spread a quarter of the filling mixture evenly over half of the tortilla, leaving a small border around the edge. Then, I fold the tortilla over to create a half-moon shape, enclosing the filling inside.
Cook the Quesadillas: I heat a large skillet or griddle over medium heat and lightly brush it with olive oil or spray it with cooking spray. Once the pan is hot, I place the filled quesadilla on the skillet and cook for 2-3 minutes on each side, or until golden brown and the cheese has melted.
Serve: Once the quesadilla is ready, I remove it from the skillet and let it cool for a minute. Then, I cut it into wedges and serve them warm. I often pair mine with additional salsa, sour cream, or guacamole for extra flavor.
Servings and Timing
Prep Time: 10 minutes
Cook Time: 10 minutes
Serving Size: 4 servings
Variations
Veggie Quesadilla: I sometimes skip the meat and make a veggie-only version with extra bell peppers, onions, spinach, and even mushrooms.
Spicy Quesadilla: For a bit of heat, I add diced jalapeños to the filling or serve with spicy salsa or hot sauce.
Breakfast Quesadilla: For a breakfast twist, I add scrambled eggs and crispy bacon to the mix.
Storage/Reheating
If I have leftovers, I store them in an airtight container in the refrigerator for up to 2-3 days. To reheat, I simply place the quesadilla in a skillet over medium heat for a few minutes on each side until it’s warmed through and the cheese is melty again. You can also reheat them in a microwave, though they won’t be as crispy.
Yes, I often prep the filling ahead of time and store it in the fridge. This makes assembling the quesadillas much quicker when I’m ready to cook.
Can I freeze the quesadillas?
Absolutely! I sometimes freeze assembled but uncooked quesadillas. I wrap them tightly in foil or plastic wrap and store them in a freezer-safe bag. When ready to eat, I cook them straight from frozen, adding a little extra time to ensure they’re heated through.
What’s the best cheese for quesadillas?
I like using a blend of cheddar and Monterey Jack for the best melt and flavor, but any cheese that melts well, like mozzarella or Mexican blend cheese, works perfectly.
Can I use a different type of tortilla?
Yes, I often switch things up and use whole wheat or gluten-free tortillas depending on what I have on hand.
How do I know when the quesadilla is ready?
I wait for the outside to turn golden brown and crispy, and I check by gently pressing on the quesadilla to see if the cheese has fully melted. It should be slightly soft and oozy inside.
Conclusion
These Quick Quesadillas are a fantastic, go-to recipe for a delicious, filling meal in no time. I love how customizable they are, so I can change the fillings based on what I have in the fridge or what I’m in the mood for. Whether I’m cooking for myself or for a crowd, this recipe is a winner every time!
These Quick Quesadillas are a cheesy, customizable dish with your choice of protein, vegetables, and salsa, all melted into a crispy tortilla. Perfect for a quick meal or snack!
Ingredients
4 large flour tortillas
2 cups shredded cheese (cheddar, Monterey Jack, or a blend)
1/2 cup diced onions
1 cup cooked and shredded chicken, beef, or beans (optional)
1/2 cup diced bell peppers (any color)
1/2 cup salsa
1/4 cup chopped cilantro (optional)
Salt and pepper to taste
Olive oil or cooking spray
Instructions
Prepare the Filling: In a bowl, mix together shredded cheese, cooked and shredded chicken or beans (if using), diced bell peppers, diced onions, salsa, and chopped cilantro (if using). Add salt and pepper to taste.
Assemble the Quesadillas: Place a tortilla on a flat surface and spread a quarter of the filling mixture evenly over half of the tortilla. Fold the tortilla over to create a half-moon shape, enclosing the filling.
Cook the Quesadillas: Heat a large skillet or griddle over medium heat and lightly brush it with olive oil or spray with cooking spray. Once hot, cook the filled quesadilla for 2-3 minutes on each side until golden brown and the cheese is melted.
Serve: Remove the quesadilla from the skillet, let it cool for a minute, then cut it into wedges and serve warm. Pair with salsa, sour cream, or guacamole for extra flavor.
Notes
For a veggie-only version, skip the meat and use extra bell peppers, onions, spinach, and mushrooms.
For a spicy kick, add diced jalapeños to the filling or serve with hot sauce.
For a breakfast twist, add scrambled eggs and crispy bacon to the quesadilla.
Leftovers can be stored in the refrigerator for up to 2-3 days and reheated in a skillet or microwave.
You can freeze assembled, uncooked quesadillas for later use.