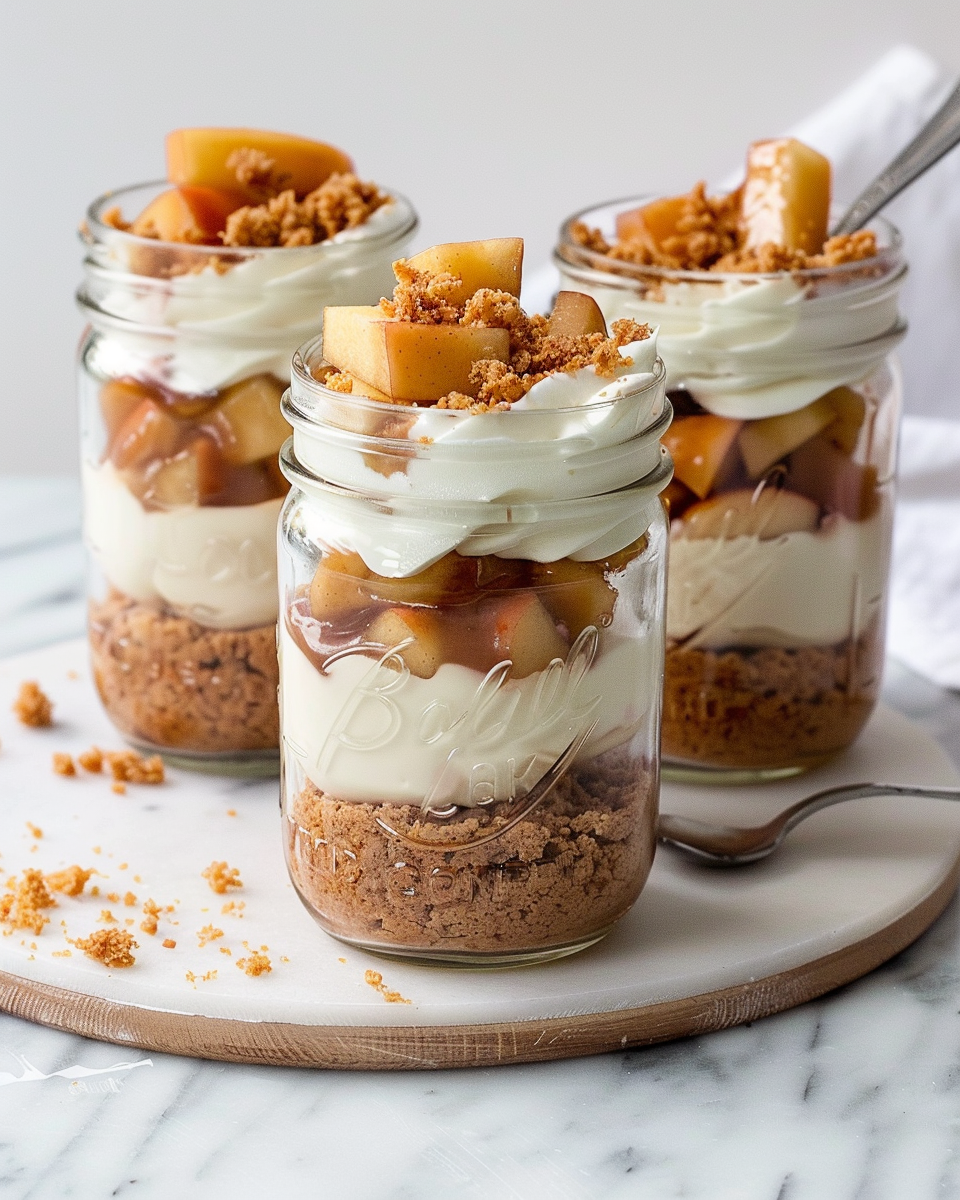
This No-Bake Apple Cheesecake Jars recipe features creamy cheesecake layered with a spiced apple compote and a buttery graham cracker crust. It’s a quick and easy fall-inspired dessert perfect for gatherings or any time of year, with no baking required!
Ingredients:
For the Crust:
1 cup graham cracker crumbs
2 tablespoons granulated sugar
4 tablespoons unsalted butter, melted
For the Cheesecake Layer:
8 ounces cream cheese, softened
1 cup heavy cream, chilled
½ cup powdered sugar
1 teaspoon vanilla extract
For the Apple Topping:
2 medium apples, peeled, cored, and diced
2 tablespoons unsalted butter
½ teaspoon ground cinnamon
2 tablespoons brown sugar
1 teaspoon lemon juice
Optional Garnish:
Whipped cream
Crushed graham crackers
Caramel sauce
Directions:
Prepare the Crust: In a bowl, combine the graham cracker crumbs, granulated sugar, and melted butter. Mix until the ingredients are well incorporated. Press 2-3 tablespoons of the crust mixture into the bottom of each jar or serving glass, and set aside.
Make the Cheesecake Layer: In a separate mixing bowl, beat the softened cream cheese until smooth and creamy. In a chilled bowl, whip the heavy cream until stiff peaks form. Gently fold the whipped cream and powdered sugar into the cream cheese mixture, along with the vanilla extract, until smooth and fluffy.
Prepare the Apple Topping: In a skillet over medium heat, melt the butter. Add the brown sugar and cinnamon, and stir until the mixture becomes smooth and bubbly. Add the diced apples and cook for about 5-7 minutes until the apples are softened. Stir in the lemon juice, then set the apple mixture aside to cool.
Assemble the Jars: Start by layering the cheesecake mixture over the graham cracker crust in each jar, filling each jar about halfway. Top with a layer of the spiced apple topping. If you like, you can repeat the layers, ending with a generous scoop of the apple topping on top.
Garnish and Serve: Top your cheesecake jars with whipped cream, crushed graham crackers, or a drizzle of caramel sauce for extra flavor. Chill the jars in the refrigerator for at least 1 hour before serving to let the flavors set.
Serving Tips:
Chill Before Serving: For the best texture and flavor, make sure to chill the jars in the refrigerator for at least 1 hour before serving. This allows the cheesecake to firm up and the flavors to meld together.
Add a Personal Touch: Customize each jar by garnishing with whipped cream, a sprinkle of cinnamon, crushed graham crackers, or a drizzle of caramel sauce. These toppings not only enhance the flavor but also add visual appeal.
Serve with Drinks: Pair these individual cheesecake jars with hot beverages like spiced apple cider, coffee, or a warm latte for the perfect fall treat.
Presentation: Serve the jars as individual portions for an elegant and hassle-free dessert. They are great for picnics, potlucks, or any gathering where guests can easily grab their own serving.
Storage Tips:
Refrigeration: No-Bake Apple Cheesecake Jars should be stored in the refrigerator to keep the cheesecake layer creamy and fresh. Cover the jars with lids or plastic wrap to prevent them from absorbing any odors from other foods in the fridge.
Storage Duration: These cheesecake jars can be stored in the refrigerator for up to 3 days. The flavors will continue to meld, and the texture will remain delicious. Just make sure to consume them within this time frame for the best taste and texture.
Freezing (Optional): While the cheesecake layer may freeze well, the apple topping can become a little watery after thawing. If you want to store them longer, you can freeze the jars without the apple topping. Freeze the jars for up to 2 months. To serve, allow them to thaw in the fridge for several hours, and then top with freshly made apple compote.
Avoid Storing Toppings: If you plan to store the jars for a while, it’s best to keep the apple topping and optional garnishes in separate containers. This will prevent the apples from becoming soggy and the whipped cream from deflating.
Related Recipes:


