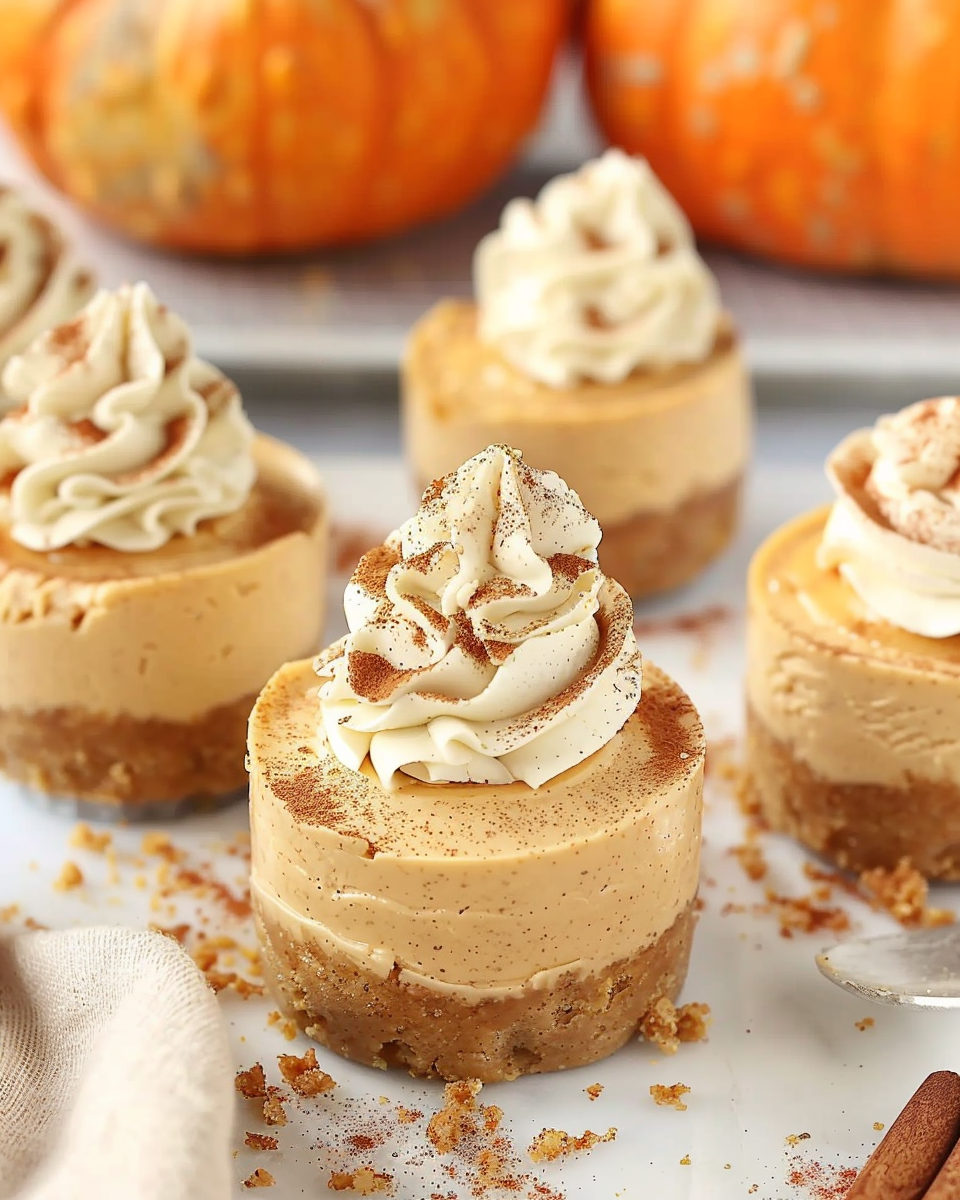
Indulge in the flavors of fall with these delightful No-Bake Pumpkin Mini Cheesecakes. They are the perfect treat for any occasion, combining the creamy goodness of cheesecake with the rich taste of pumpkin and warm spices. Whether for Thanksgiving, Halloween, or just a cozy dessert night, these mini cheesecakes are sure to impress.
Ingredients:
For the Crust:
1 1/2 cups graham cracker crumbs
1/4 cup granulated sugar
6 tablespoons unsalted butter, melted
For the Cheesecake Filling:
1 cup powdered sugar
1 cup canned pumpkin puree
16 oz cream cheese, softened
1 teaspoon pumpkin pie spice
1 teaspoon vanilla extract
01 1/2 cups whipped topping
For Garnish:
Whipped cream
Ground cinnamon or extra pumpkin pie spice
Graham cracker crumbs
Directions:
Make the Crust:
In a medium bowl, combine the graham cracker crumbs, granulated sugar, and melted butter. Mix well until fully incorporated. Press this mixture firmly into the bottoms of 12 lined muffin cups to form a crust. Place the muffin pan in the refrigerator to chill while preparing the filling.
Prepare the Filling:
In a large bowl, use an electric mixer to beat the softened cream cheese and powdered sugar together until the mixture is smooth and creamy. Add in the pumpkin puree, pumpkin pie spice, and vanilla extract. Mix until fully combined and smooth.
Fold in Whipped Topping:
Gently fold the whipped topping into the pumpkin mixture. This step is crucial for achieving that light and fluffy texture that makes these cheesecakes irresistible.
Assemble:
Spoon the cheesecake filling evenly into the chilled muffin cups, spreading it smoothly over the crust. Ensure each cup is filled generously to enjoy a rich cheesecake experience.
Chill:
Refrigerate the assembled mini cheesecakes for at least 2-3 hours. This allows the cheesecakes to set properly, making them easier to serve and enhancing their flavors.
Garnish and Serve:
Once set, carefully remove the cheesecakes from the muffin pan. Top each mini cheesecake with a dollop of whipped cream, a sprinkle of ground cinnamon or extra pumpkin pie spice, and a few graham cracker crumbs for an added crunch. Serve chilled and enjoy!
Serving Tips:
Presentation: Serve the mini cheesecakes on a decorative platter. Consider adding some fall-themed garnishes, like small pumpkins or autumn leaves, for a festive touch.
Serving Size: Each mini cheesecake is a perfect portion. For larger gatherings, consider serving them alongside other desserts to provide variety.
Temperature: Serve the cheesecakes chilled for the best flavor and texture. If they’ve been in the fridge for a while, you can let them sit at room temperature for about 10 minutes before serving to soften slightly.
Garnishes: Customize the garnishes based on your preferences. In addition to whipped cream and cinnamon, you can add caramel drizzle or even chocolate shavings for an extra treat.
Storage Tips:
Refrigeration: Store leftover mini cheesecakes in an airtight container in the refrigerator. They will keep well for up to 3 days.
Freezing: If you want to make them ahead of time, you can freeze the un-garnished mini cheesecakes. Wrap each cheesecake tightly in plastic wrap and then in aluminum foil. They can be frozen for up to 2 months. Thaw in the refrigerator before serving and garnish as desired.
Avoid Moisture: When storing in the refrigerator, ensure the container is airtight to prevent moisture from affecting the texture of the cheesecakes.
Garnish Before Serving: For the best presentation and taste, add any whipped cream or additional toppings just before serving, rather than storing them with the garnishes.
Related Recipes:
FAQs:
Conclusion:
These No-Bake Pumpkin Mini Cheesecakes are a delightful and easy dessert that captures the essence of autumn in every bite. With a buttery graham cracker crust and a luscious pumpkin filling, they make a fantastic addition to any dessert table. Try making them for your next gathering, and watch your guests rave about this creamy, dreamy treat.
📖 Recipe:
Print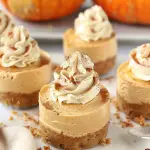
No-Bake Pumpkin Mini Cheesecakes
- Total Time: 2-3 hours (including chilling time)
- Yield: 12 mini cheesecakes
- Diet: Vegetarian
Description
Indulge in the flavors of fall with these No-Bake Pumpkin Mini Cheesecakes. Featuring a buttery graham cracker crust and a creamy pumpkin filling spiced with pumpkin pie spice, these delightful treats are perfect for any autumn gathering. Easy to make and served in individual portions, they are a crowd-pleaser for holidays like Thanksgiving or Halloween. Enjoy the rich taste of pumpkin without turning on the oven!
Ingredients
For the Crust:
1 1/2 cups graham cracker crumbs
1/4 cup granulated sugar
6 tablespoons unsalted butter, melted
For the Cheesecake Filling:
16 oz cream cheese, softened
1 cup powdered sugar
1 cup canned pumpkin puree
1 teaspoon pumpkin pie spice
1 teaspoon vanilla extract
1 1/2 cups whipped topping
For Garnish:
Whipped cream
Ground cinnamon or extra pumpkin pie spice
Graham cracker crumbs
Instructions
- Make the Crust: In a medium bowl, mix graham cracker crumbs, sugar, and melted butter until well combined. Press the mixture into the bottoms of 12 lined muffin cups to form the crust. Set in the fridge to chill.
- Prepare the Filling: In a large bowl, beat softened cream cheese and powdered sugar until smooth. Add pumpkin puree, pumpkin pie spice, and vanilla extract. Mix until fully combined.
- Fold in Whipped Topping: Gently fold the whipped topping into the pumpkin mixture until light and fluffy.
- Assemble: Spoon the filling evenly into the chilled muffin cups, spreading it smoothly over the crust.
- Chill: Refrigerate for at least 2-3 hours until the cheesecakes are set.
- Garnish and Serve: Top each mini cheesecake with whipped cream, a sprinkle of cinnamon or pumpkin pie spice, and extra graham cracker crumbs.
Notes
For the best flavor, use high-quality cream cheese and pure pumpkin puree.
Store leftovers in an airtight container in the refrigerator for up to 3 days.
You can freeze un-garnished cheesecakes for up to 2 months.
- Prep Time: 15 minutes
- Category: Dessert
- Method: No-Bake
- Cuisine: American
Nutrition
- Serving Size: 12 mini cheesecakes